Limited Access Cut Plans: Choosing Between Diamond Wire Sawing, Wall Sawing, and Core Drilling Indoors
A practical decision framework for sensitive sites and live facilities (GTA/Ontario + Canada-wide wire sawing)
Indoor controlled demolition is rarely limited by “can we cut concrete.”
It’s limited by access and risk controls—especially in mechanical rooms, banks, airports, active buildings, and tight retrofit zones.
A limited access cut plan answers four questions:
- How do we separate the structure? (wire / wall / core, or hybrid)
- How do we avoid damage? (no-blind-cuts verification, controlled vibration/noise)
- How do we handle the pieces? (segment sizing + rigging/hauling method)
- How do we reset the area? (wet cutting + slurry capture + cleanup standard)
1) What “limited access” actually means on real indoor sites
For us, the biggest bottleneck is simple: door width.
- Typical hard limit: 36 in doors (often 36 in with frame clearance)
- We’ve had situations where a wire saw setup passes in a true 36 in opening—but only “in a pinch,” sometimes with external covers removed to clear the frame.
Other “limited access” patterns that matter:
- Upper floors (freight elevator logistics, staging limits, and haul-out routes)
- Long corridors + restricted turns (not always the main issue, but it compounds)
- No impact demolition allowed (no breaker work, no “hammering it out”)
- No gasoline saws (odor + alarms + ventilation problems)
- Water discharge restrictions (slurry handling becomes part of the plan)
2) Constraint map: the five things that decide the method
This is the order we evaluate constraints on sensitive indoor scopes.
Constraint 1 — Silica/dust control
Many indoor scopes default to wet methods because silica exposure becomes a stop-work risk. OSHA’s silica standard for construction sets a PEL of 50 μg/m³ (8-hour TWA).
Controlled testing also shows why wet cutting is the norm: wet cutting reduced respirable dust by ~85% vs dry cutting in paired tests.
Constraint 2 — Noise limits and tenant sensitivity
Ontario’s noise regulation framework references an 85 dBA Lex,8 exposure limit concept—important for worker exposure planning and a common reason sites restrict impact methods.
Constraint 3 — Vibration (the most common “hard stop” indoors)
For sensitive rooms and equipment-adjacent work, vibration is often the #1 constraint.
IHSA references a daily EAV 2.5 m/s² and ELV 5.0 m/s² (A(8)) for hand-arm vibration—useful context for why facilities push crews away from impact-heavy approaches.
Constraint 4 — Water + slurry handling
Wet cutting trades airborne dust for slurry. If the facility doesn’t allow drain discharge, your plan must include collection + removal (vac, containment, sealed containers, staged disposal).
Constraint 5 — Logistics and haul-out reality
Cutting is only half the job. If a piece cannot pass a 36" door, fit an elevator, or be staged safely, the plan fails—even if the cut is perfect.
3) The decision framework (fast and buildable)
Use this as the estimator/engineer filter.

Step A — What is the thickness and geometry?
- If thickness is ~12 in (30 cm) or more, and especially if the shape is awkward (columns, beams, irregular nodes), Diamond Wire Sawing becomes the default.
- If you can mount track cleanly and the scope is straight-line separation/openings, wall sawing is efficient up to ~12–16 in (30–40 cm)—after that, speed drops and wear climbs.
Step B — Is vibration a “hard no”?
If the site says no vibration, move away from impact demolition and bias toward wire sawing + controlled handling.
Step C — Do you need penetrations or starter holes?
Core drilling is not “optional support.” Indoors it’s often the enabler:
- starter holes for wire feeds
- stitch drilling patterns
- controlled penetrations for MEP
- rigging/attachment points (when engineered)
Step D — Can you physically position the tool?
This is where wire sawing wins in limited access: it can cut where wall saw framing is difficult and where space is confined. Hilti explicitly lists wire cutting for noise-sensitive locations and when space is too confined for wall saws.
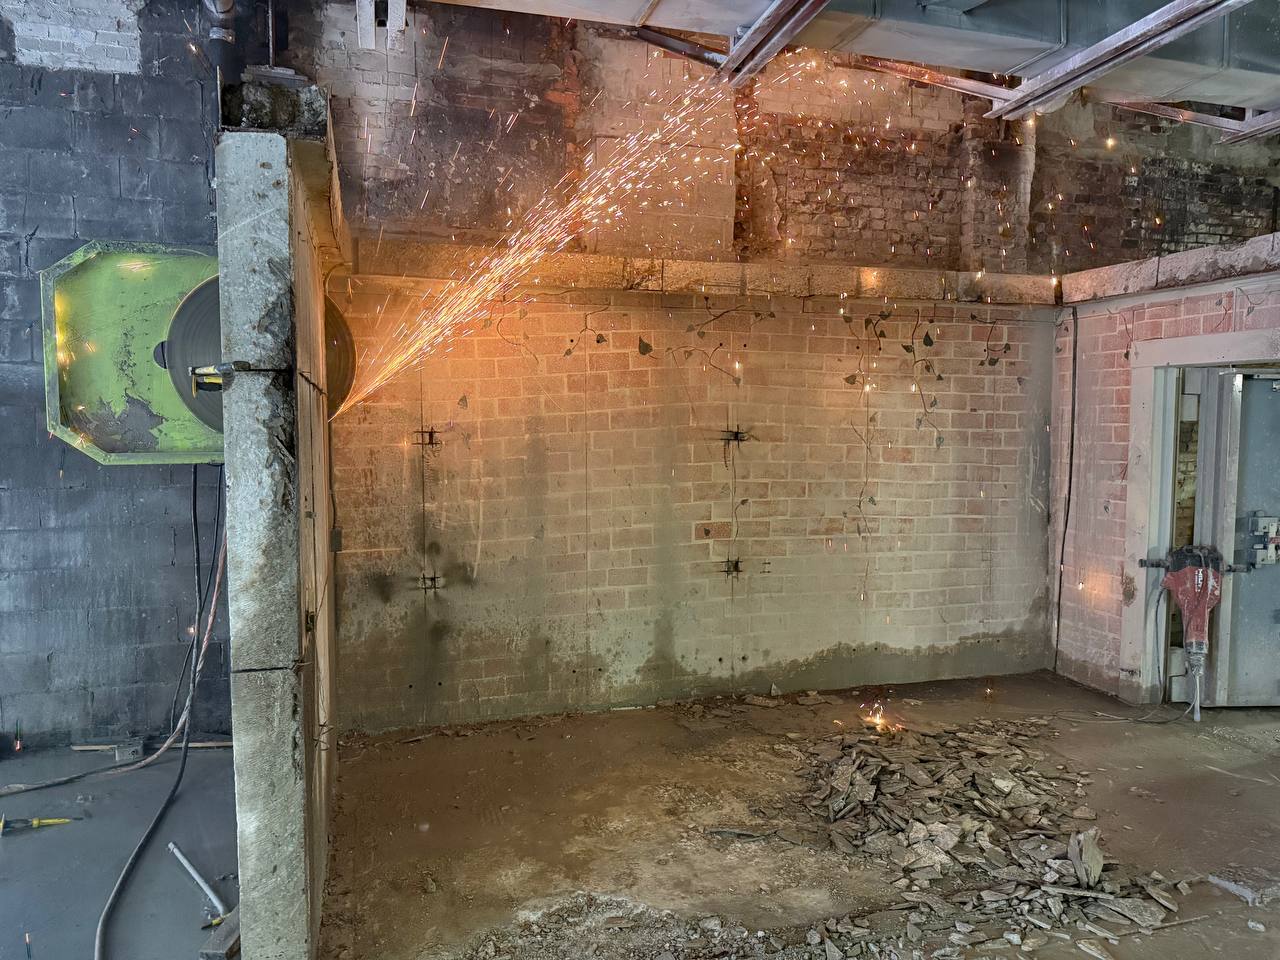
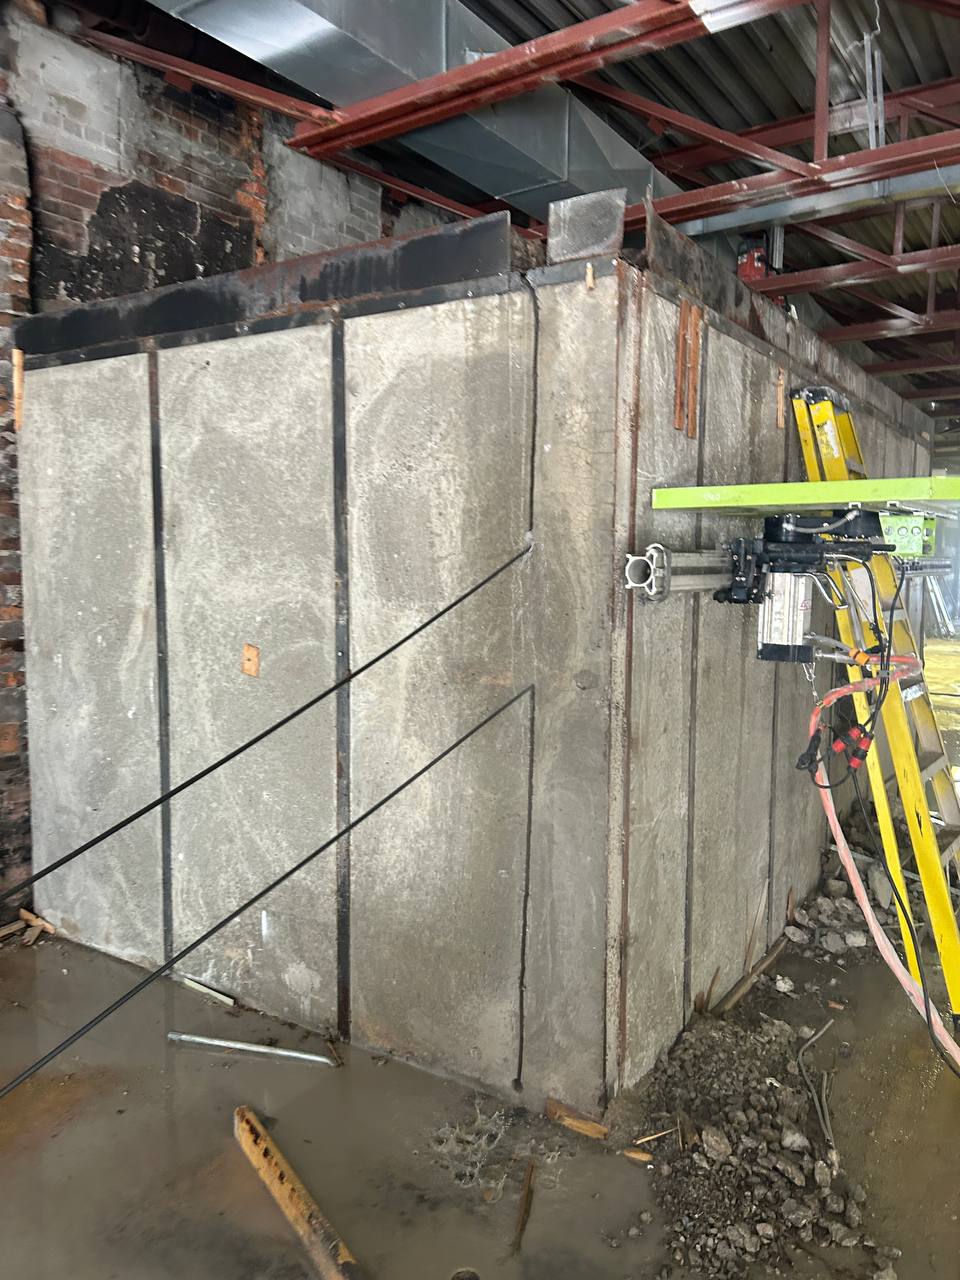
4) Method #1 — Diamond Wire Sawing indoors
Best fit when:
- thickness ≥ ~12 in (30 cm) or dense reinforcement slows saws
- the shape is irregular (columns, beams, odd nodes)
- you suspect heavy embedded steel (plates/rails)
- you need low-vibration separation and the operator can stand clear
Why it works in limited access:
Wire sawing moves the “cutting action” away from the operator and can route around constraints. That distance matters when the site is sensitive and tight.
Practical wire metrics we use (planning, not marketing)
- Wire wear benchmark (your field metric): ~2.0–2.5 m² of cut per 1 m of wire on reinforced concrete around ~16 in (40 cm) thickness.
- Expect worse wear on thinner sections because tighter cornering and bending can increase damage and polishing.
Wire sawing success drivers indoors
- No-blind-cuts verification (scan/locate, confirm rebar direction where it changes plan/wear)
- Angle-of-attack control (roller layout matters; if speed drops, you adjust the wire path)
- Edge prep (remove sharp corners before the first run to protect the wire)
- Segmentation tied to haul-out, not to “nice looking grid lines”
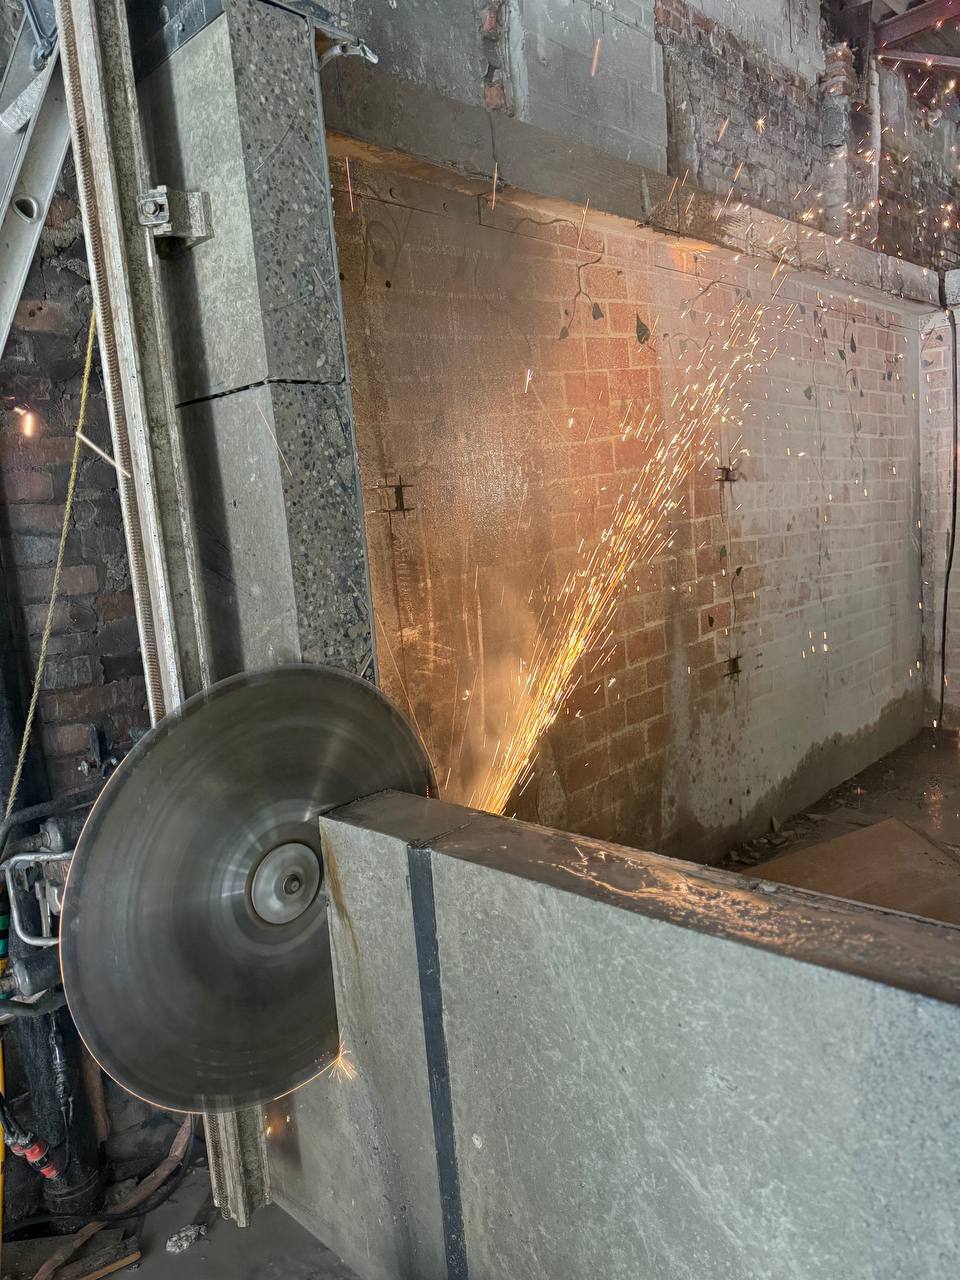
5) Method #2 — Wall sawing indoors
Wall saws shine when the cut is straight, you can mount track, and you want clean edges.
Typical indoor sweet spot (your operating range):
- regular production up to ~12–16 in (30–40 cm) thickness, depending on access and reinforcement.
For context, one heavy wall saw spec lists a maximum cutting depth of 29 in (equipment-dependent), which shows the upper bound of what wall sawing systems can be designed to do—though indoor reality still depends on access and speed.
Realistic production benchmark (your number)
When anchoring and setup are clean, you’ve seen ~20 m (~66 ft) of cut line per shift at roughly ~12 in depth, site-dependent.
Where wall sawing becomes “pain” indoors
- you can’t mount the system safely
- the element is too thick for efficient progress
- geometry forces awkward angles
- embedded steel density spikes wear and time
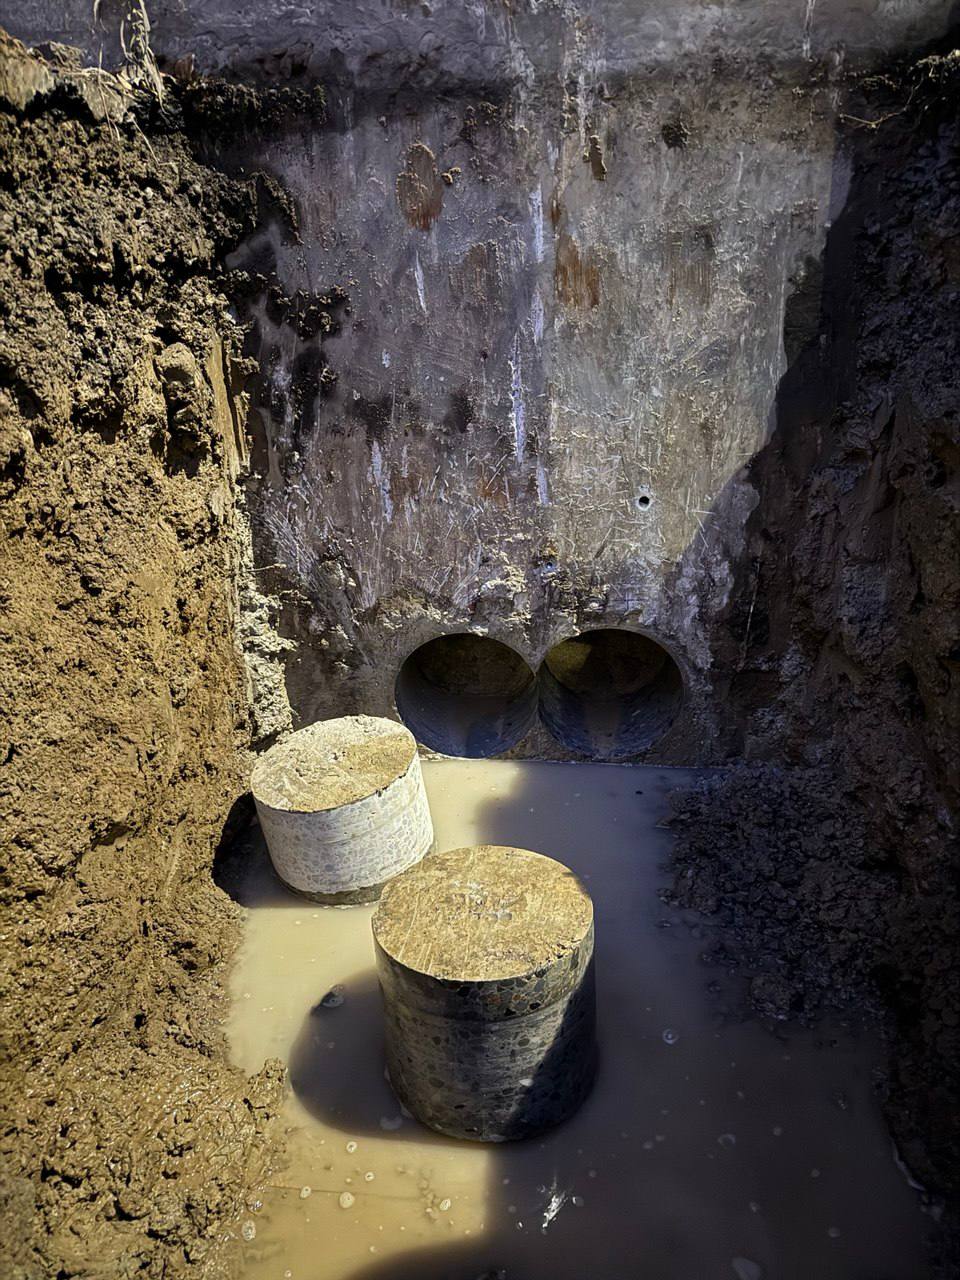
6) Method #3 — Core drilling indoors
Core drilling is the precision tool for penetrations and also the support method that makes wire sawing possible.
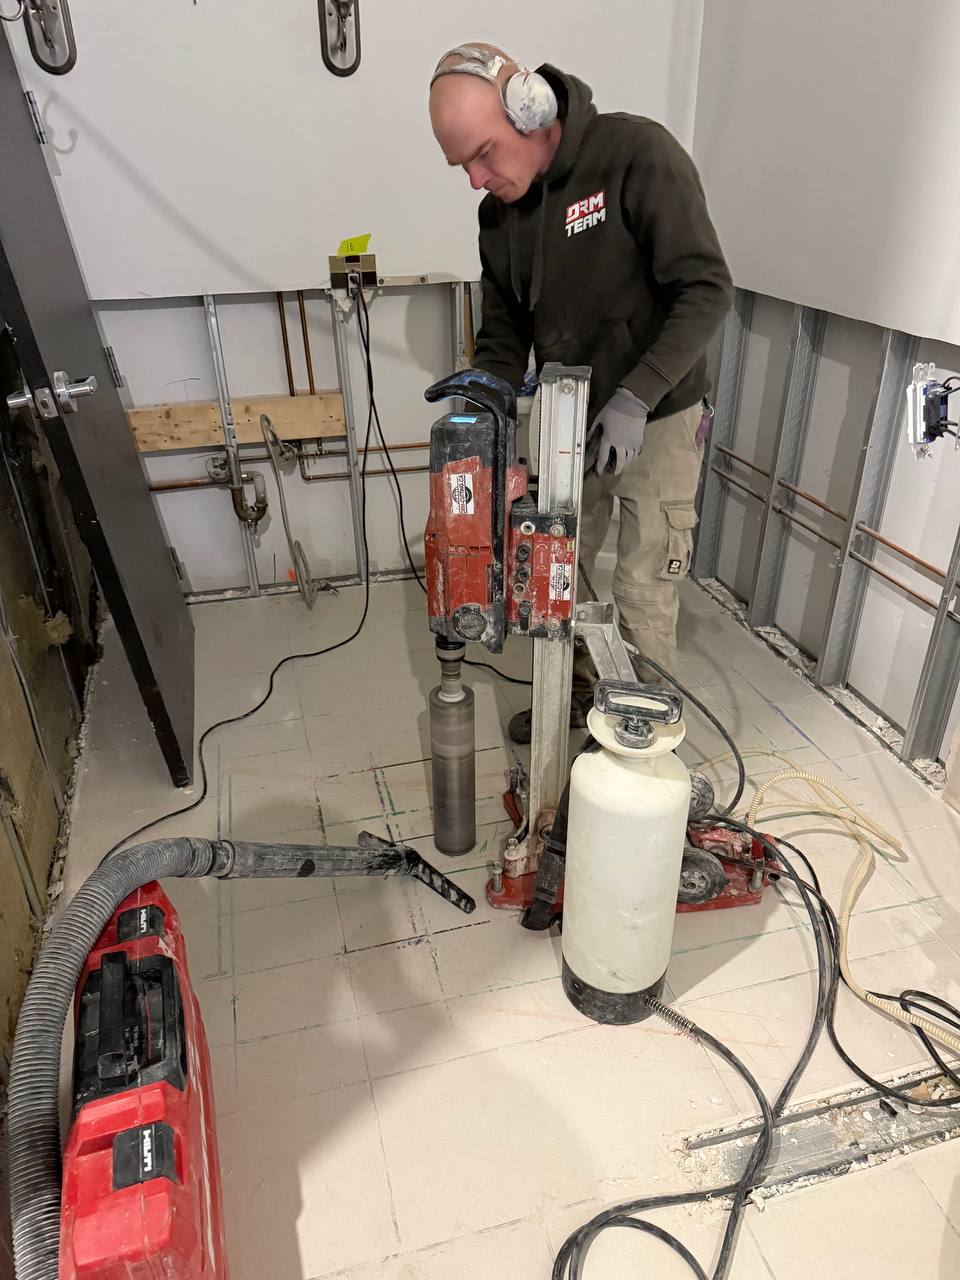
Your typical diameter range: 2 in to 12 in
Common everyday holes: 4–6 in (constant), with 8 in less frequent.
For reference, rig-based coring systems are commonly spec’d into the high teens in diameter on reinforced concrete (example: 2-1/16 to 19-11/16 in for a heavy-duty rig-based system).
Typical productivity (your number)
If holes are not scattered across multiple floors and the route is reasonable: ~15–18 holes per shift in the 4–6 in range.
Indoor coring details that make or break the job
- Catching cores (no dropped cylinders onto equipment below)
- Localized containment (protect finished areas, control water migration)
- Night shifts (common when the space below is occupied)
7) Hybrid cut plans (what wins most often indoors)
Most limited access scopes are not single-method jobs.
Core + wire
- starter holes feed the wire
- wire removes thick foundations/nodes cleanly
- best when vibration is restricted and thickness is high
Wall saw + core
- wall saw creates clean edges/openings
- coring handles penetrations, corners, or stitch patterns
- best for openings, trench edges, and controlled boundaries
Wall saw + wire
- wall saw handles what it can reach cleanly
- wire takes over when thickness/geometry makes wall sawing inefficient
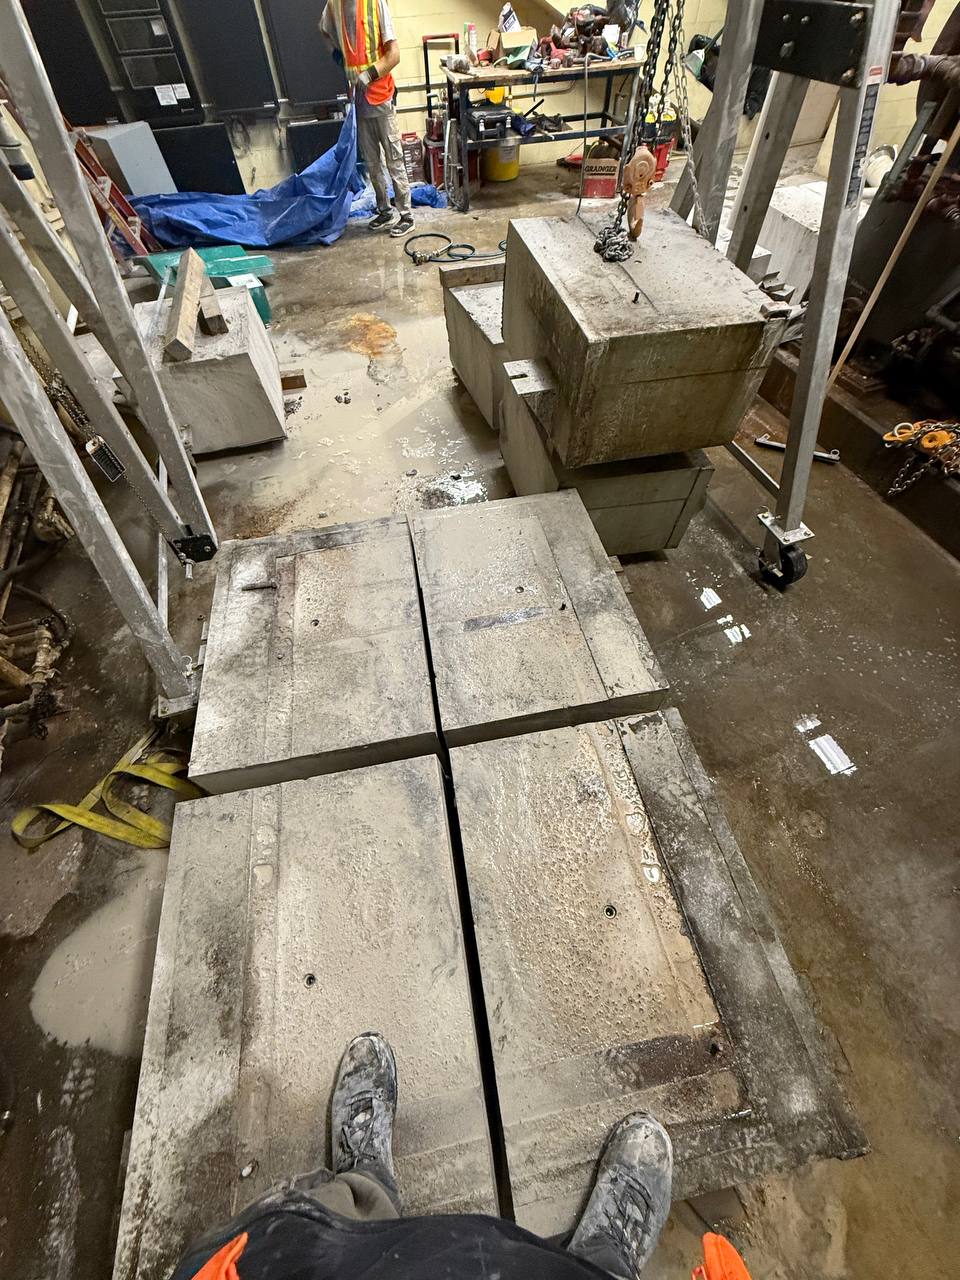
8) The handling math (the part most cut plans ignore)
We size segments using volume × unit weight, then constrain by the tightest access point and available handling tools.
Normal-weight concrete density commonly falls around 140–150 lb/ft³ (2240–2400 kg/m³).
Estimator formula (fast):
- Weight (lb) = Volume (ft³) × 150 lb/ft³
- Weight (kg) = Volume (m³) × 2400–2500 kg/m³ (planning range)
Why this matters:
If your door is 36 in and your elevator/staging is tight, segmentation is your control lever—too big and you stall the job; too small and you inflate cutting time.
9) Case snapshots (anonymized, with real field numbers)
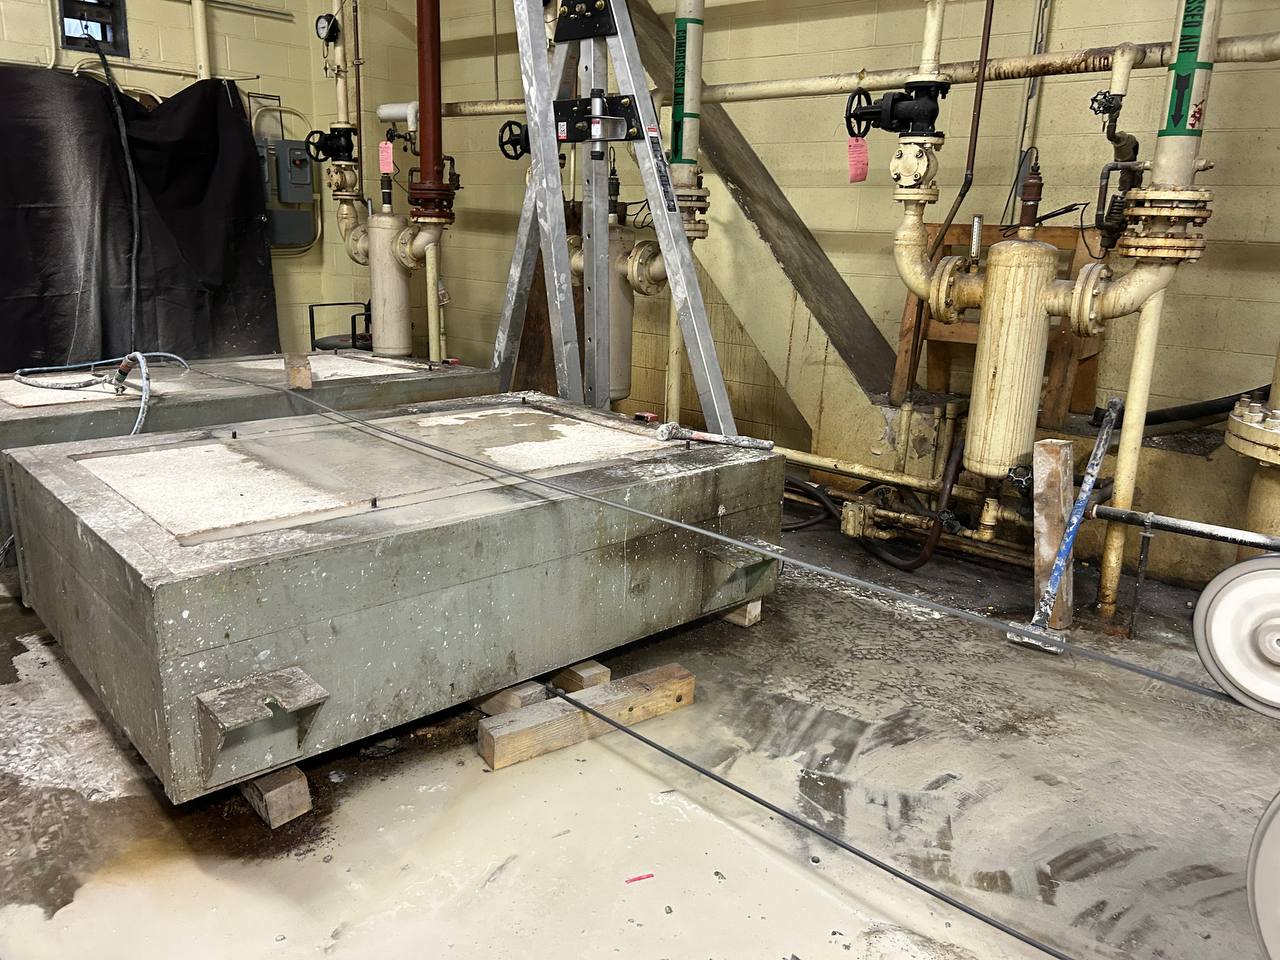
Case #1 — Airport mechanical room, second floor: thick foundation removal with Diamond Wire Sawing
Scope: Remove three equipment foundations using Diamond Wire Sawing
Access constraint: 36 in doors + corridor + freight elevator to second floor
Work window: 3 day shifts (approx. 9 AM–5 PM)
Thickness: 2 ft (24 in)
Segmentation: each foundation into 4 blocks sized 2 ft × 2 ft × 3 ft
Total blocks: 3 × 4 = 12 blocks
Mass math (planning):
- One block volume: 2×2×3 = 12 ft³
- Using 150 lb/ft³ → ~1,800 lb per block (order-of-magnitude)
Primary constraint: vibration control (no impact demo; sensitive environment)
Result: predictable haul-out sized to access route and indoor handling.
Case #2 — Bank vault wall cut: wall sawing with steel-backed condition
Scope: Cut a ~6 m (~20 ft) wall section for controlled removal
Thickness: ~15 cm (~6 in) concrete
Condition: steel sheet on the back side (sensitivity to method choice and sequencing)
Method logic: wall saw for straight-line control + planned handling and removal sequence.
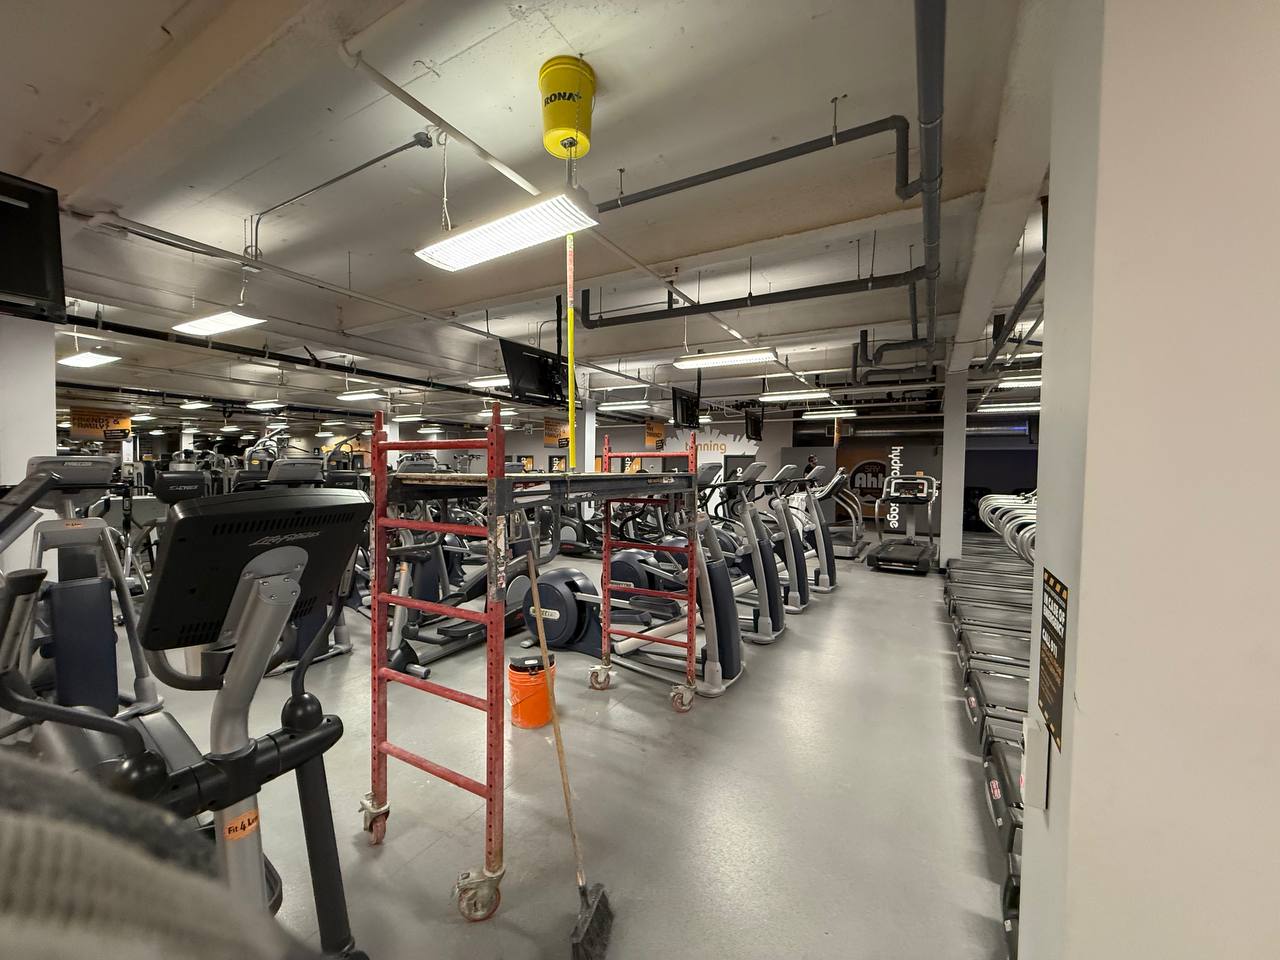
Case #3 — Fitness center night coring: controlled cores and zero drop risk
Scope: 20 holes, 4 in diameter, 10 in thick slab
Constraint: equipment below + public occupancy → work performed at night
Control method: localized isolation + core capture (no falling cylinders), disciplined water control, and cleanup standard.
10) Estimator checklist (what we need to build a cut plan that won’t stall)
Send these up front and you get a more accurate plan and fewer surprises:
Access geometry
- smallest door width (often 36 in)
- elevator availability and size
- corridor path + staging points
Constraints
- vibration/noise restrictions
- silica/dust expectations (wet cutting + containment)
- water/slurry rules (drain allowed or not)
Structure
- thickness range (or permission for a test-zone verification)
- reinforcement assumptions and embedded steel risk
Removal
- what handling tools are permitted (dollies, pallet jack, skates, chain fall, forklift/skid steer by approval)
- loading plan (bin/truck proximity)
Technical next step (soft CTA)
If the structure is thick, access is tight, and vibration is restricted, the fastest way to lock the plan is:
- A site walk + a small test-zone verification scan to confirm thickness, reinforcement direction, and embedded risks
- then we issue a cut plan that ties method selection to haul-out reality (segment size, route, staging, cleanup standard)